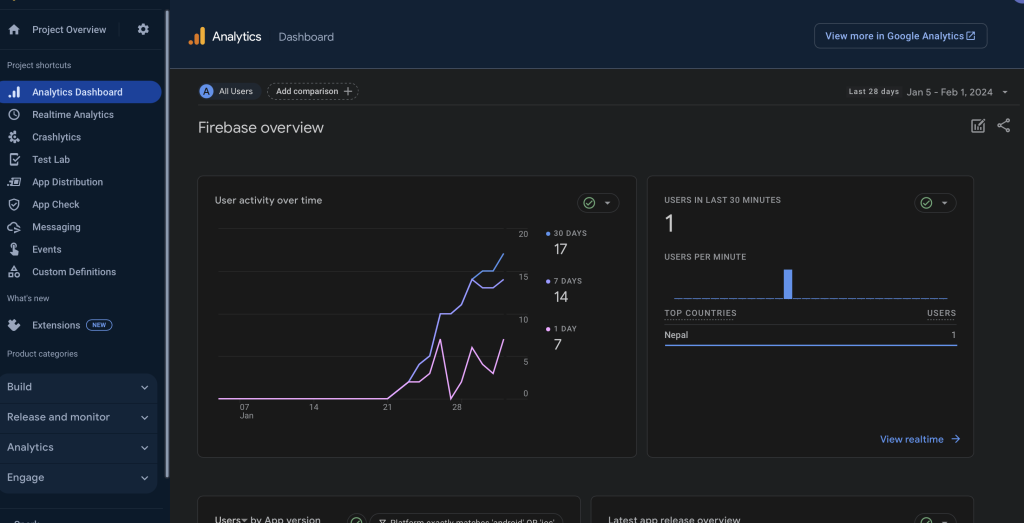
By the end of this tutorial, you’ll know How to use Firebase analytics in a flutter. let’s dive into the details. Before starting do not forget to set up all the configurations needed for Firebase Analytics. You can follow Officials Docs.
Table of Contents
Steps to use Firebase analytics in a Flutter
Understanding user behavior and engagement is crucial for success in today’s competitive app landscape. Firebase Analytics offers a powerful solution for tracking various aspects of user interaction within your Flutter app. In this guide, we’ll delve into the implementation of Firebase Analytics in Flutter, focusing on the AnalyticsPage and AnalyticsEvents classes for efficient tracking.

Create a Flutter Project
If you haven’t already created a Flutter project, run the following commands in your terminal:
flutter create my_flutter_analytics_app
Add Firebase to your Flutter project
Go to the Firebase Console (https://console.firebase.google.com/), create a new project, and follow the setup instructions to add Firebase to your project.
Once you have your google-services.json file, place it in the android/app directory for Android and GoogleService-Info.plist in the ios/Runner directory for iOS.
Add Dependencies
In your pubspec.yaml file, add the Firebase and Crashlytics dependencies:
dependencies:
  flutter:
    sdk: flutter
  firebase_core: ^latest_version
  firebase_analytics: ^9.1.11
Run flutter pub get to fetch the dependencies.
Initialize Firebase in your Flutter app
In your main.dart file, initialize Firebase:
import 'package:firebase_core/firebase_core.dart';

void main() async {
  WidgetsFlutterBinding.ensureInitialized();
  await Firebase.initializeApp();
  runApp(MyApp());
}
Setting the Scene with AnalyticsPage Class
The AnalyticsPage class is designed to handle screen tracking within your app using Firebase Analytics. Each method within this class corresponds to a specific screen, and it is utilized setCurrentScreen to set the current screen, providing valuable insights into user navigation and engagement.
Create a file called analytics.dart for eg:
import 'package:firebase_analytics/firebase_analytics.dart';

const mob = 'dev';

class AnalyticsPage {
  static var analytics = FirebaseAnalytics.instance;

  static Future<void>? analyticsLogin() async =>
      await analytics.setCurrentScreen(
        screenName: '${mob}LoginPage',
      );

  static Future<void>? analyticsSignUp() async =>
      await analytics.setCurrentScreen(screenName: '${mob}SignUpPage');

  static Future<void>? analyticsProductDescription({String? slug}) async =>
      await analytics.setCurrentScreen(screenName: '${mob}Details$slug');

  static Future<void>? analyticsContactUs() async =>
      await analytics.setCurrentScreen(screenName: '${mob}ContactUsPage');

  static Future<void>? analyticsNoOfRegisterBusiness() async =>
      await analytics.setCurrentScreen(screenName: '${mob}eventEditPage');

}

class AnalyticsEvents {
  static var analytics = FirebaseAnalytics.instance;

  // Login event
  static Future<void>? analyticsLogin() async =>
      await analytics.logEvent(name: 'RegularLoginEvent', parameters: {
        "LoginEvent": "LoginEvent"
      });

  // Logout event
  static Future<void>? analyticsLogout({required String logoutUser}) async =>
      await analytics.logEvent(name: 'logout', parameters: {
        "logout": logoutUser,
      });

  // User language event
  static Future<void>? analyticsUserLg({required String lg}) async =>
      await analytics
          .logEvent(name: '${mob} userLanguage', parameters: {"lg": lg});

  // Signup event
  static Future<void>? analyticsSignup({required String location}) async =>
      await analytics.logEvent(name: '${mob}RegularSignupEvent', parameters: {
        "SignupEvent": "SingupEvent",
        "location": location,
      });

  // products event
  static Future<void>? analyticsBuyProducts() async =>
      await analytics.logEvent(name: '${mob}orders');

}
Use the above methods like this:
  _validate() {
    AnalyticsPage.analyticsLogin();
    AnalyticsEvents.analyticsLogin();
    if (_formKey.currentState!.validate()) {
      // your code here
    }
  }
These methods track user interactions with various app features, such as viewing user profiles, creating businesses, and interacting with social media data.
You can check your Firebase Analytics dashboard for user engagement.

Also, Read Related Tutorials
- Shorebird: The Easy Way to Update Flutter Android Apps
- [Solved] RenderBox was not laid out in Flutter
Conclusion
By integrating the AnalyticsPage and AnalyticsEvents classes into your Flutter app, you gain a robust Firebase Analytics setup. This setup allows you to comprehensively track user interactions and navigation, providing valuable insights for making informed decisions to enhance user engagement and satisfaction.
Implementing Firebase Analytics is a powerful step toward optimizing your app’s performance and user experience. With the right analytics in place, you can make data-driven decisions to refine and improve your Flutter app.

What about askind for permissions for the app tracking? I’ve heard that apparently it’s necessary especially for iOS.