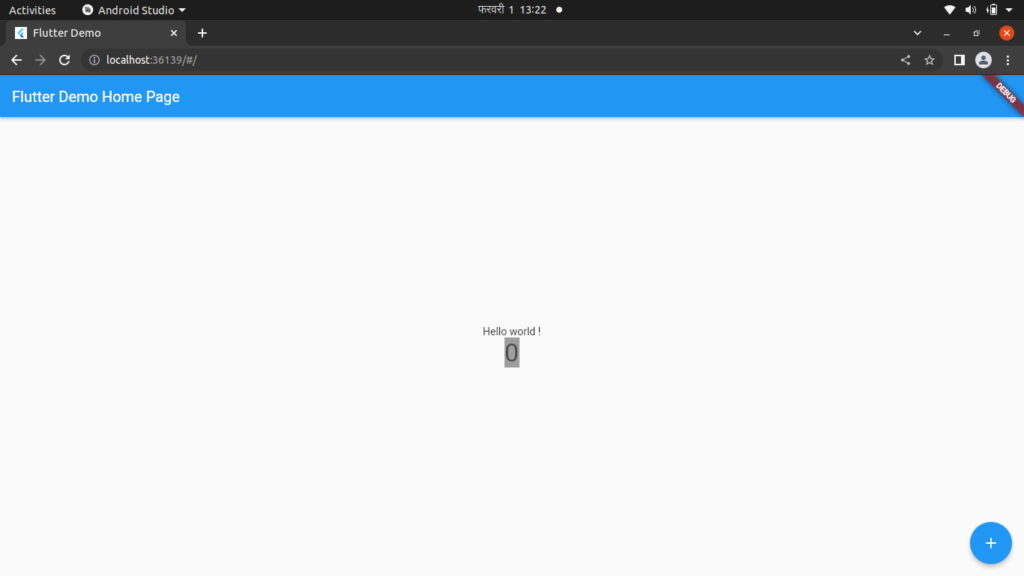
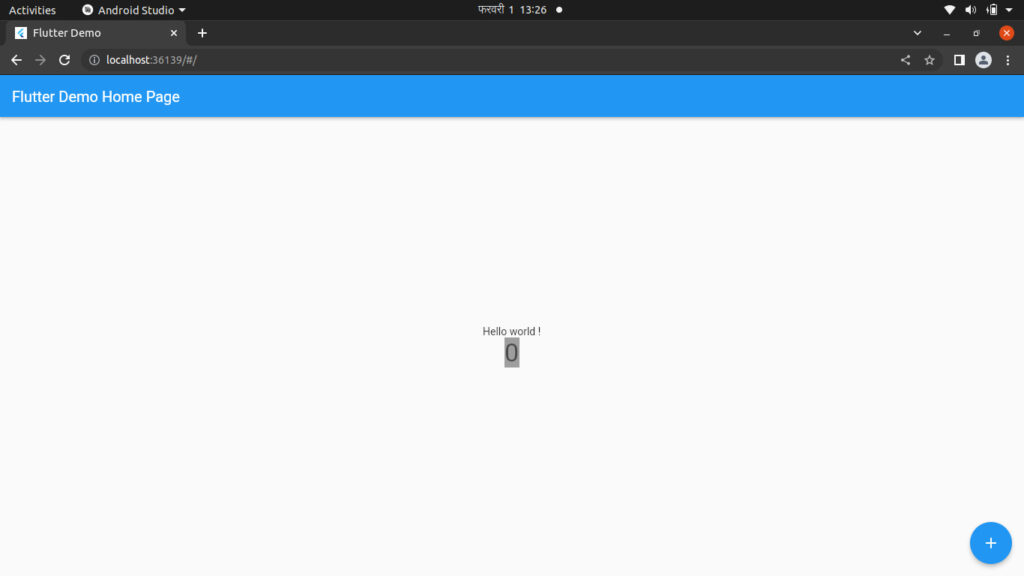
In this tutorial, we’ll show you how to hide debug banner in Flutter. When you develop a Flutter app, you might have noticed the “DEBUG” tag in the top-left corner of your app. While this tag is helpful during the development phase, it’s essential to remove it before releasing your app to the app store.
Table of Contents
Why Remove the Debug Tag?
The “DEBUG” tag is a visual indicator that your app is running in debug mode. It serves as a reminder that your app is not optimized for production and may contain debugging code or less secure features.
Furthermore, having the debug tag visible in your released app can be considered unprofessional and may give users the impression that your app is unfinished or unstable.

Steps to Hide Debug Banner in Flutter

@override

Widget build(BuildContext context) {

 return MaterialApp(

   title: 'Flutter Demo',

   theme: ThemeData(

     primarySwatch: Colors.blue,

   ),

   home: const MyHomePage(title: 'Flutter Demo Home Page'),

 );

}
No need to do so many things to hide the debug banner on the main page just apply, `debugShowCheckedModeBanner: false,` inside the Material app. Like this:
Check Out: How to Prevent Stack Children from Being Overwritten in Flutter?

@override

Widget build(BuildContext context) {

 return MaterialApp(

   debugShowCheckedModeBanner: false,

   title: 'Flutter Demo',

   theme: ThemeData(

     primarySwatch: Colors.blue,

   ),

   home: const MyHomePage(title: 'Flutter Demo Home Page'),

 );

}
Conclusion
Removing the debug tag is a crucial step in preparing your Flutter app for release. It not only enhances the professional appearance of your app but also ensures that your users have a smooth and polished experience.
By following the steps outlined in this tutorial, you can easily remove the debug tag and get your app ready for submission to the app store.
