In this blog post, we’ll explore how to create a dynamic Table Widget in Flutter using a practical example. Tables are a crucial part of many applications, aiding in the organization and presentation of data.
In this guide, we’ll explore the capabilities of the Table widget in Flutter, including its usage, properties, and examples of creating dynamic tables to suit different application requirements.
Whether you’re building a data-driven dashboard, a product catalog, or a financial report, understanding how to leverage the Table widget will empower you to create rich and interactive user interfaces in your Flutter applications.
Let’s dive in and discover the versatility of the Table widget in Flutter development.
Table of Contents

Introduction to the Table Widget in Flutter
Tables are fundamental components in user interface design, providing a structured way to organize and present data in rows and columns.
In Flutter, a versatile UI toolkit for building natively compiled applications, the Table widget serves as a powerful tool for creating tables with dynamic content and layout flexibility.
The Table widget allows developers to create tables that adapt to various screen sizes and orientations, making it suitable for a wide range of applications across mobile, web, and desktop platforms.
With the ability to customize cell content, styling, and alignment, Flutter’s Table widget offers developers a robust solution for displaying tabular data in a visually appealing and user-friendly manner.
Implementing Dynamic Table Widget in Flutter
Now, let’s implement dynamic tables in Flutter using the provided code example.
import 'package:flutter/material.dart';

void main() {
  runApp(MyApp());
}

class MyApp extends StatelessWidget {
  @override
  Widget build(BuildContext context) {
    return MaterialApp(
      title: 'Dynamic Table',
      theme: ThemeData(
        primarySwatch: Colors.blue,
      ),
      home: MyHomePage(),
      debugShowCheckedModeBanner: false,
    );
  }
}

class MyHomePage extends StatefulWidget {
  @override
  _MyHomePageState createState() => _MyHomePageState();
}

class _MyHomePageState extends State<MyHomePage> {
  List<List<String>> tableData = [
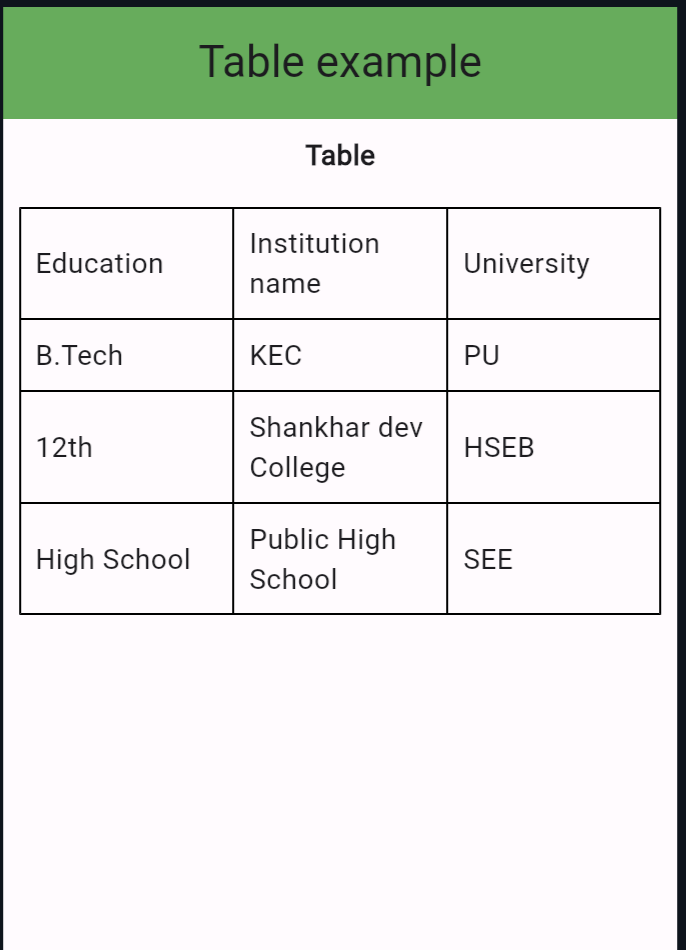
    ["Education", "Institution name", "University"],
    ["B.Tech", "KEC", "PU"],
    ["12th", "Shankhar dev College", "HSEB"],
    ["High School", "Public High School", "SEE"],
  ];

  @override
  Widget build(BuildContext context) {
    return Scaffold(
      appBar: AppBar(
        title: Text("Table example"),
        backgroundColor: Colors.green,
      ),
      body: Column(
        children: <Widget>[
          Padding(
            padding: const EdgeInsets.all(8.0),
            child: Text(
              "Table",
              style: TextStyle(fontWeight: FontWeight.bold),
            ),
          ),
          Padding(
            padding: const EdgeInsets.all(8.0),
            child: Table(
              border: TableBorder.all(color: Colors.black),
              defaultVerticalAlignment: TableCellVerticalAlignment.middle,
              children: tableData.map((row) {
                return TableRow(
                  children: row.map((cell) {
                    return TableCell(
                      child: Padding(
                        padding: const EdgeInsets.all(8.0),
                        child: Text(
                          cell,
                        ),
                      ),
                    );
                  }).toList(),
                );
              }).toList(),
            ),
          ),
        ],
      ),
    );
  }
}
Explanation of Code
- The provided Flutter code demonstrates how to create a dynamic table using the
Tablewidget. - We begin by defining a Flutter app in the
MyAppclass. TheMaterialAppwidget provides basic material design and visual layout structure. - In the
MyHomePageclass, we define a list of lists (tableData), where each inner list represents a row in the table. This data structure makes the table dynamic and adaptable to changes. - The
buildmethod of_MyHomePageStatereturns aScaffoldwidget, which provides the basic structure of the app’s visual layout. Inside theScaffold, we have anAppBarand aColumncontaining the table. - Within the
Column, we display a title (“Table”) and aTablewidget. TheTablewidget contains a list ofTableRowwidgets, each representing a row in the table. - For each row, we map over the list of cells (
row) and create aTableCellfor each cell value. TheTableCellcontains aTextwidget displaying the cell value. - The
borderproperty of theTablewidget is set toTableBorder.all(color: Colors.black)to add borders around the table cells. - Finally, the
defaultVerticalAlignmentproperty is set toTableCellVerticalAlignment.middleto align the content vertically within each cell.
Output:

Also Read
Conclusion
In this blog post, we’ve explored how to create dynamic tables in Flutter using a practical example. By following the provided code and explanation, you can easily implement dynamic tables in your Flutter applications to display structured data effectively.
Tables are versatile widgets that can be customized further to suit your specific design and data presentation needs. You can follow the official documentation to set up Flutter: Flutter Installation Guide.
