In this blog post, we’ll walk through the process of building a simple Flutter app that check a leap year. We’ll use the Dart programming language and Flutter framework to create an interactive mobile application.
Table of Contents
Step-by-Step Guide – check a leap year

Step 1: Create a New Flutter Project
Open your lib/main.dart file and replace its content with the following code:
Understanding the Code
Let’s break down the code step-by-step:
Main Function and MyApp Class
void main() {
  runApp(MyApp());
}

class MyApp extends StatelessWidget {
  @override
  Widget build(BuildContext context) {
    return MaterialApp(
      title: 'Leap Year Checker',
      home: LeapYearCheckerScreen(),
    );
  }
}
- The
mainfunction is the entry point of the app, which callsrunAppto start the app. MyAppis a stateless widget that sets up theMaterialAppwith the title ‘Leap Year Checker’ and specifies theLeapYearCheckerScreenas the home screen.
LeapYearCheckerScreen Stateful Widget
class LeapYearCheckerScreen extends StatefulWidget {
  @override
  _LeapYearCheckerScreenState createState() => _LeapYearCheckerScreenState();
}

class _LeapYearCheckerScreenState extends State<LeapYearCheckerScreen> {
  final _controller = TextEditingController();
  String _result = "";
LeapYearCheckerScreen is a stateful widget that creates a state object _LeapYearCheckerScreenState._controller is a TextEditingController that manages the input from the user._result stores the result of the leap year check.
Leap Year Logic
bool isLeapYear(int year) {
  if (year % 4 == 0) {
    if (year % 100 == 0) {
      return year % 400 == 0;
    } else {
      return true;
    }
  } else {
    return false;
  }
}
isLeapYear function checks if the given year is a leap year based on the leap year rules.
Check a Leap Year Function
void _checkLeapYear() {
  setState(() {
    try {
      int year = int.parse(_controller.text);
      _result = isLeapYear(year) ? "Leap Year" : "Not a Leap Year";
    } catch (e) {
      _result = "Invalid Input";
    }
  });
}
_checkLeapYear function is called when the user clicks the ‘Check’ button. It parses the input year and updates _result accordingly.
Building the UI to check a leap year
import 'package:flutter/material.dart';

void main() {
  runApp(MyApp());
}

class MyApp extends StatelessWidget {
  @override
  Widget build(BuildContext context) {
    return MaterialApp(
      title: 'Leap Year Checker',
      home: LeapYearCheckerScreen(),
    );
  }
}

class LeapYearCheckerScreen extends StatefulWidget {
  @override
  _LeapYearCheckerScreenState createState() => _LeapYearCheckerScreenState();
}

class _LeapYearCheckerScreenState extends State<LeapYearCheckerScreen> {
  final _controller = TextEditingController();
  String _result = "";

  bool isLeapYear(int year) {
    if (year % 4 == 0) {
      if (year % 100 == 0) {
        return year % 400 == 0;
      } else {
        return true;
      }
    } else {
      return false;
    }
  }

  void _checkLeapYear() {
    setState(() {
      try {
        int year = int.parse(_controller.text);
        _result = isLeapYear(year) ? "Leap Year" : "Not a Leap Year";
      } catch (e) {
        _result = "Invalid Input";
      }
    });
  }

  @override
  Widget build(BuildContext context) {
    return Scaffold(
      appBar: AppBar(
        title: Text('Leap Year Checker'),
      ),
      body: Padding(
        padding: const EdgeInsets.all(20.0),
        child: Column(
          mainAxisAlignment: MainAxisAlignment.center,
          children: [
            TextField(
              controller: _controller,
              keyboardType: TextInputType.number,
              decoration: InputDecoration(
                labelText: 'Enter a year',
              ),
            ),
            SizedBox(height: 20),
            ElevatedButton(
              onPressed: _checkLeapYear,
              child: Text('Check'),
            ),
            SizedBox(height: 20),
            Text(
              _result,
              style: TextStyle(fontSize: 20),
            ),
          ],
        ),
      ),
    );
  }
}
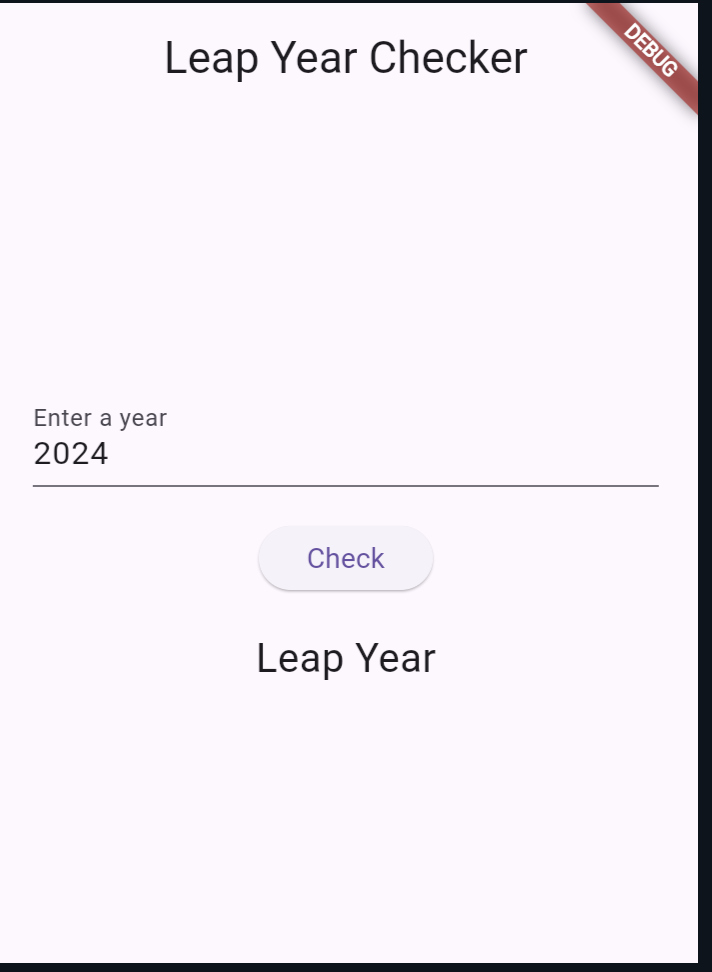
The build method creates the UI of the app, including a TextField for user input, an ElevatedButton to trigger the check and a Text widget to display the result.
Output:

Also Read:
Conclusion
In this blog post, we built a simple Flutter app that checks if a given year is a leap year. We covered the basics of creating a Flutter project, setting up the UI, and implementing the logic for leap year checking. Flutter makes it easy to build beautiful and functional mobile applications with minimal effort.
