In this tutorial, we’ll explore how to change the size of the floating action button in Flutter using the package:flutter/material.dart package.
Specifically, we’ll use the GestureDetector and Slider widgets to enable both movement and dynamic resizing of the button. Additionally, we’ll provide a brief introduction to the FloatingActionButton and its default positions.
Table of Contents
Prerequisites to change the size of the floating action button in Flutter
Before proceeding, ensure that you have Flutter installed on your system. If not, follow the official Flutter installation guide.

Setting Up the Project
Create a new Flutter project by running the following commands in your terminal:
flutter create movable_resizable_button
cd movable_resizable_button
Open the project in your preferred code editor.
Understanding FloatingActionButton Defaults
The FloatingActionButton is a material design floating action button, commonly used to trigger the primary action in an application.
By default, it is anchored to the bottom-right corner of the screen. Flutter provides flexibility to customize its appearance and behavior based on your application’s requirements.
Writing the Code
Now, let’s integrate the movable and resizable button into our project. Replace the content of the lib/main.dart file with the following code:
import 'package:flutter/material.dart';

void main() {
  runApp(MyApp());
}

class MyApp extends StatelessWidget {
  @override
  Widget build(BuildContext context) {
    return MaterialApp(
      home: MyHomePage(),
    );
  }
}

class MyHomePage extends StatefulWidget {
  @override
  _MyHomePageState createState() => _MyHomePageState();
}

class _MyHomePageState extends State<MyHomePage> {
  double _positionX = 16.0;
  double _positionY = 16.0;
  double _buttonWidth = 56.0;
  double _buttonHeight = 56.0;
  double _sliderValue = 50.0; // Initial value

  @override
  Widget build(BuildContext context) {
    return Scaffold(
      appBar: AppBar(
        title: Text('Movable and Resizable Button'),
      ),
      body: Stack(
        children: [
          // Your application content goes here

          Positioned(
            left: _positionX,
            top: _positionY,
            child: GestureDetector(
              onPanUpdate: (details) {
                setState(() {
                  _positionX += details.primaryDelta!.dx;
                  _positionY += details.primaryDelta!.dy;
                });
              },
              child: Container(
                width: _buttonWidth,
                height: _buttonHeight,
                child: FloatingActionButton(
                  onPressed: () {},
                  backgroundColor: Colors.blue,
                  child: Icon(Icons.touch_app, color: Colors.white),
                ),
              ),
            ),
          ),

          Positioned(
            bottom: 16.0,
            left: 16.0,
            right: 16.0,
            child: Slider(
              value: _sliderValue,
              min: 20.0,
              max: 100.0,
              onChanged: (value) {
                setState(() {
                  _sliderValue = value;
                  _buttonHeight = _sliderValue;
                  _buttonWidth = _sliderValue; // Adjust as needed
                });
              },
            ),
          ),
        ],
      ),
    );
  }
}
Understanding the Code
We’ve covered the key components of the code in the previous section. Now, let’s add a brief introduction to the FloatingActionButton and its default positions.
Introduction to FloatingActionButton
The FloatingActionButton is a circular button with an elevation that hovers above the content of an app and is used for a promoted action.
It is a key element in the material design philosophy and typically represents the primary action a user can take on a specific screen or context.
Default Positions of FloatingActionButton
By default, the FloatingActionButton is anchored to the bottom-right corner of the screen. However, Flutter provides flexibility to customize its position. Common positions include FloatingActionButtonLocation.centerDocked, FloatingActionButtonLocation.endDocked, and more. These can be specified when using a Scaffold widget.
In our example, we’ve created a standalone FloatingActionButton within a GestureDetector for a more customized experience. The default positioning behavior is not directly utilized in this case.
Running the App
Save the changes and run your Flutter app using the following command in the terminal:
flutter run
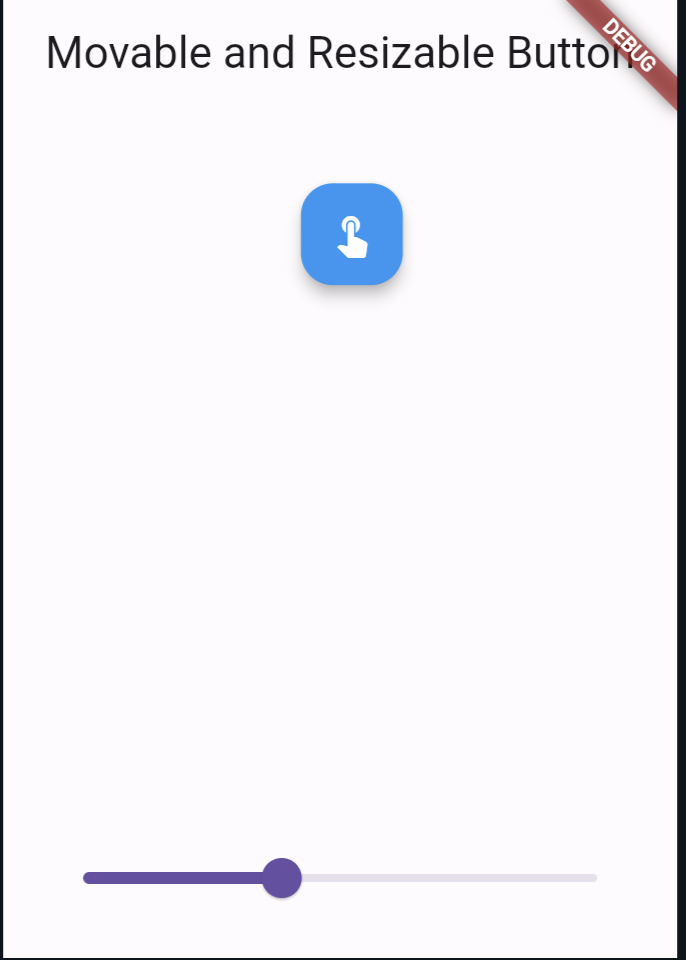
You should now have a movable and resizable button application. Feel free to experiment with different values and enhance the code to fit your specific design preferences.
Output:

Also, Read Related Tutorials
- A RenderFlex overflowed by 36 pixels on the right using row
- How to hide debug banner from the application main page in Flutter?
Conclusion
In this tutorial, we explored how to create a movable and resizable button in Flutter using the GestureDetector and Slider widgets.
Additionally, we provided a brief introduction to the FloatingActionButton and its default positions. Flutter’s flexibility and rich set of widgets empower developers to create engaging and dynamic user interfaces.
Use this example as a foundation for further customization and exploration of Flutter’s capabilities.
